![]()

Best 3D Rendering Software for Interior Design: Transform Your Vision Into Photorealistic Spaces
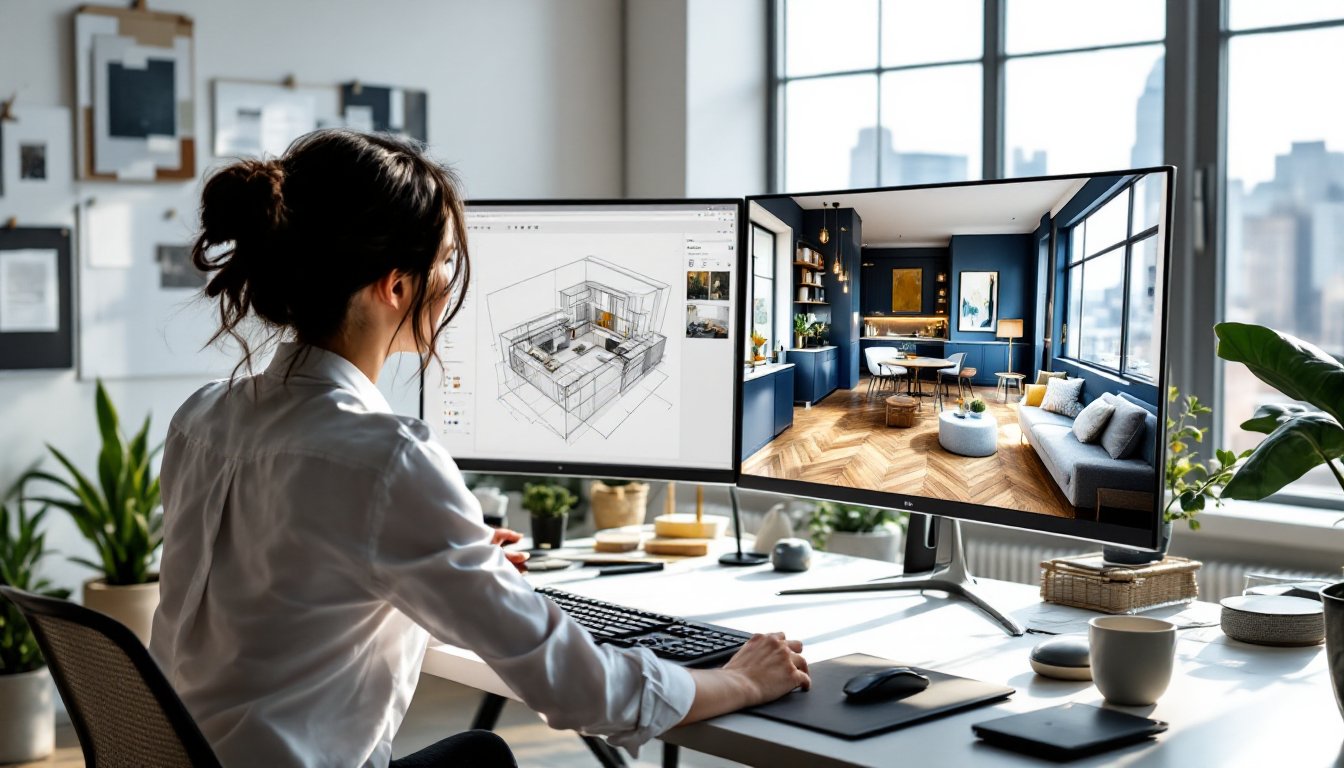
Interior designers juggling client expectations, contractor coordination, and spatial uncertainty know the frustration of sketches that don’t sell the vision. A floor plan shows dimensions, but it doesn’t show how afternoon light hits that custom millwork or whether the sectional overwhelms the room. That’s where 3D rendering software changes the game. Instead of relying on client imagination or expensive mockups, designers can generate photorealistic images that show exactly what a finished space will look like, down to the grain in the flooring and the texture on the accent wall. Whether working on residential remodels or commercial fit-outs, the right rendering tool turns abstract concepts into visual proof.
Key Takeaways
- 3D rendering software for interior design eliminates costly on-site mistakes by allowing designers to spot issues like pendant light placement or layout conflicts before construction begins.
- Photorealistic renders accelerate client approvals and decision-making by showing exactly how materials, colors, and lighting will look in the finished space.
- Professional-grade tools like Autodesk 3ds Max and Lumion deliver high-end results for large projects, while budget-friendly options like Cedreo and Planner 5D suit small designers and residential work.
- Essential features to prioritize include robust material libraries, precise lighting controls, manufacturer furniture imports, and hardware that supports efficient rendering without crashes or excessive wait times.
- Getting started with 3D rendering requires picking one room, importing existing floor plans, applying base materials, using accurate furniture dimensions, and iterating on client feedback rather than attempting complex whole-house projects initially.
Why 3D Rendering Software Is Essential for Modern Interior Designers
The traditional mood board, fabric swatches taped to poster board with magazine clippings, doesn’t cut it anymore. Clients want to see the space before a single wall gets painted or a fixture gets ordered. 3D rendering software delivers that certainty.
First, it eliminates costly mistakes. When a designer can rotate a virtual room and spot that the pendant light hangs too low over the dining table or that the built-in shelving blocks a window, changes happen in software instead of on-site with a contractor on the clock. Material substitutions, layout tweaks, and color shifts take minutes instead of days.
Second, it accelerates client approvals. A photorealistic render showing how the herringbone tile flows into the living area or how the navy cabinets complement the brass hardware makes decision-making faster. Clients spend less time second-guessing and more time moving forward.
Third, it improves contractor communication. Handing over a detailed 3D model alongside 2D plans reduces misinterpretation. The electrician sees exactly where the sconces mount, the tile setter understands the pattern layout, and the painter knows which walls get the accent color.
Finally, rendering software supports marketing and portfolio development. High-quality visuals attract new clients, showcase design capabilities, and differentiate a designer’s work in competitive markets. The software isn’t just a design tool, it’s a business tool.
Top 3D Rendering Software Options for Interior Design Projects
Choosing rendering software depends on project scope, technical skill, and budget. Here’s a breakdown of top options across different use cases.
Professional-Grade Solutions for Large-Scale Projects
Autodesk 3ds Max remains the industry standard for high-end interior visualization. It offers robust modeling tools, advanced lighting controls, and V-Ray integration for photorealistic output. Designers working on luxury residential projects, hospitality spaces, or commercial interiors appreciate the granular control over materials, textures, and camera angles. The learning curve is steep, expect weeks to reach proficiency, but the results rival architectural photography. Subscription pricing starts around $235/month (as of 2026), making it a significant investment suited for firms with steady project flow.
SketchUp Pro with V-Ray or Enscape combines intuitive modeling with powerful rendering engines. SketchUp’s push-pull modeling feels natural for space planning, and plugins like V-Ray deliver production-quality renders while Enscape provides real-time walkthroughs. Many designers already use SketchUp for space planning, so adding a render engine leverages existing skills. Pricing sits around $300/year for SketchUp Pro, with rendering plugins adding $400–$700 annually depending on the engine.
Blender is the wildcard, a fully-featured, open-source 3D suite with a capable rendering engine (Cycles) that produces professional results at zero cost. The interface intimidates newcomers, and interior-specific workflows require more setup than purpose-built tools, but designers willing to invest time gain access to unlimited licenses and a massive online community. It’s ideal for solo practitioners or small studios managing tight budgets.
User-Friendly Platforms for Beginners and Small Businesses
Cedreo targets residential designers who need speed over extreme realism. It automates floor plan creation, furniture placement, and material application, generating serviceable renders in under an hour. The trade-off? Less control over lighting nuance and material detail. Pricing starts around $99/month, reasonable for designers handling multiple projects monthly who need quick client presentations.
Planner 5D and Roomsketcher appeal to DIY designers, small-scale renovators, and e-design services. Both offer browser-based interfaces, drag-and-drop furniture libraries, and one-click rendering. Quality doesn’t match professional tools, but output suffices for budget-conscious clients or preliminary concepts. Subscriptions range from $10–$50/month depending on features.
Lumion sits between professional and accessible. It imports models from SketchUp, Revit, or AutoCAD and generates high-quality stills and walkthroughs with minimal fuss. The real-time rendering engine lets designers adjust lighting, materials, and camera angles on the fly. At around $1,800 for a perpetual license (or $500/year), it’s a one-time cost that scales well for growing businesses.
Key Features to Look for When Choosing Rendering Software
Not all rendering software serves interior design equally. Prioritize these capabilities:
Material libraries and customization: Pre-built libraries should include flooring (hardwood, tile, carpet), wall finishes (paint, wallpaper, paneling), countertops (quartz, granite, butcher block), and textiles (upholstery, drapery). Look for the ability to adjust scale, color, reflectivity, and bump mapping. Generic libraries save time: customization ensures accuracy.
Lighting control: Accurate lighting makes or breaks interior renders. Software should support multiple light types, natural (sun position, cloud cover), ambient (recessed cans, pendants, sconces), and accent (picture lights, under-cabinet LED strips). Real-time preview helps dial in mood before final rendering.
Furniture and fixture imports: Robust software allows import of manufacturer models (many brands offer free 3D files) or supports popular libraries like 3D Warehouse or TurboSquid. This ensures client presentations feature actual products, not generic stand-ins.
Ease of use vs. depth: A designer rendering one room monthly can tolerate a steeper learning curve for better output. A designer juggling six projects weekly needs fast, repeatable workflows. Match complexity to workload.
Output quality and format: Client presentations require high-resolution stills (minimum 1920×1080, ideally 4K). Contractor coordination benefits from 360-degree views or interactive walkthroughs. Verify export formats (JPEG, PNG, MP4) meet project needs.
Hardware requirements: Rendering taxes GPUs and CPUs hard. Check minimum specs before purchasing. A laptop with integrated graphics won’t handle V-Ray renders efficiently: expect crashes and multi-hour render times. Mid-range desktops with dedicated GPUs (NVIDIA RTX 3060 or better) deliver reasonable performance without breaking budgets.
How to Get Started With 3D Rendering for Interior Design
Adopting rendering software doesn’t require overhauling an entire design process overnight. Start small and scale up.
Step 1: Pick one project and one room. Don’t attempt a whole-house render on the first try. Choose a single space with moderate complexity, a living room or bedroom, not a kitchen with twenty cabinet details. Use it as a learning sandbox.
Step 2: Start with existing floor plans. Most rendering software imports AutoCAD DWG or DXF files, or accepts PDFs as underlays. Trace walls, windows, and doors in the software, matching actual dimensions. Double-check measurements, software forgives mistakes, but only if caught early.
Step 3: Apply base materials before furniture. Set flooring, wall colors, and ceiling finishes first. This establishes the room’s character and helps visualize how furniture will contrast or complement.
Step 4: Populate with furniture using accurate dimensions. Don’t guess. If the client selected a specific sofa, find its model number, get dimensions, and either import the manufacturer’s 3D file or model a placeholder to scale. A sofa modeled 6 inches too deep changes the whole room’s flow.
Step 5: Light the space like the real room. Match window orientation (south-facing rooms get different light than north-facing). Add fixtures where the electrical plan shows them. Adjust intensity until the render matches expected real-world brightness.
Step 6: Render at low quality first. High-res renders take time. Use draft or preview modes to check composition, framing, and major issues. Once satisfied, queue the final render and walk away, complex scenes can take 20 minutes to several hours.
Step 7: Collect client feedback and iterate. Clients will request changes, different paint, repositioned furniture, alternative lighting. Make edits and re-render. This iteration loop is where rendering software earns its cost, turning revisions from expensive change orders into quick digital tweaks.
Most software offers tutorials, and platforms like YouTube host thousands of walkthroughs. Dedicate a weekend to learning basics, then commit to using the tool on every project for a month. Proficiency comes from repetition, not perfection.
Conclusion
3D rendering software transforms how interior designers communicate ideas, minimize errors, and win client confidence. Whether opting for professional-grade power or beginner-friendly simplicity, the right tool aligns with project demands, technical skill, and budget. Start with one room, build proficiency through repetition, and watch how photorealistic visuals elevate both client satisfaction and business growth.